Long Term Inc.
Basic Information
- Model No.: BRA series
- Packaging: box
- Place of Origin: Zhejiang, China (Mainland)
- Brand: LT

 Bracket for air conditioning
 | Model | Specification | Thickness | Range |
| BRA-200 | 790*390*450 | 1.5mm | 1-1.5hp |
| BRA-2001 | 790*390*450 | 2.0mm | 2hp |
| BRA-2002 | 790*390*550 | 2.0mm | 3hp |
| BRA-4301 | 800*400*430 | 1.5mm | 1-1.5hp |
 The model BR220 is a complete wall mounting system meant for ductless minis-plit air conditioners and heat pumps. The mounting bracket is capable of holding up to 440 lbs. This system can handle our complete line of mini-split compressor units with ease. Installation is quick and easy. The following tools are recommended for installation: 17 mm socket, 14 mm socket, 1/2” socket, 3/8” ratchet and extension, 9/16” masonry bit, 1/2” hammer drill, claw hammer, adjustable wrench, tape measure and a pencil. Installation: Select a suitable location on the wall to install the mini-split compressor unit. Ensure it is free of obstructions which would interfere with proper compressor operation. Refer to the mini-split compressor unit installation manual for proper clearances. Refer to Figure 1 Bracket Kit Contents below and confirm that you have received all of the items shown.
  Figure 1 - Bracket Kit Contents Parts Included: a) 2 ea. horizontal wall brackets (21-3/4") b) 2 ea. vertical wall brackets (15-3/8") c) 1 ea. horizontal wall bar d) 6 ea. concrete anchors (1/2" dia.) e) 4 ea. rubber vibration pads f) 2 ea. leveling screws g) 4 ea. 14 mm nuts h) 8 ea. 5/16" washers i) 4 ea. 14 mm X 1" bolts Horizontal and vertical supports will come assembled with hinge bolt installed. Assembly Instructions, BR440L Mini-Split Wall Bracket (Cont.) 1.) Install the plastic leveling screws into the bottom hole of the Vertical Wall Supports as shown in the photographs below. Be sure to run the screws in flush with the back of the Vertical Wall supports, but do not over-tighten.
 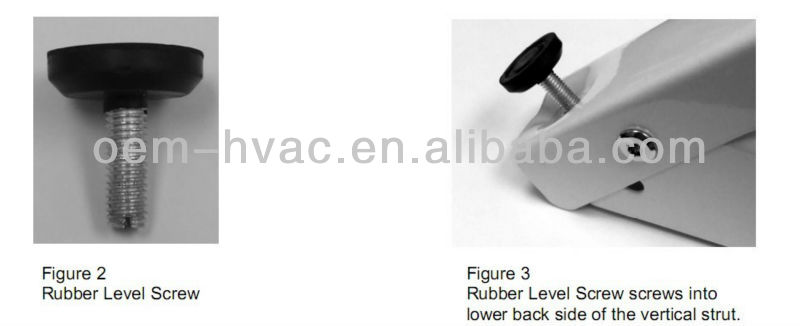 2.) Assemble the vertical wall supports to the horizontal cross bar. The vertical wall supports simply slide over the ends of the horizontal cross bar as shown in the photographs below:
  3.) Mark the mounting hole locations for the horizontal cross bar on the wall surface where the Mini-Split is to be mounted. Use the builtin level on the cross bar to insure the cross bar is mounted level.
 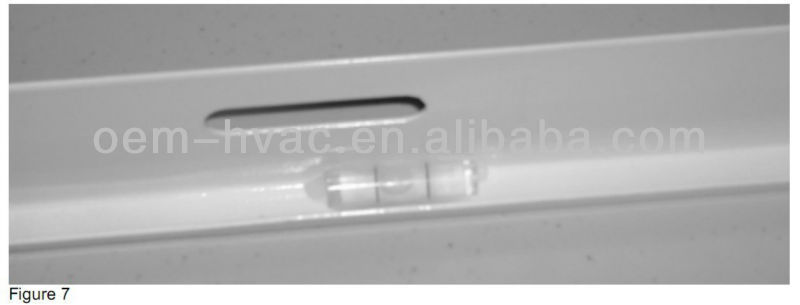 Assembly Instructions, BR440L Mini-Split Wall Bracket (Cont.) 4.) Drill three 9/16” holes 2-1/2” deep in the wall and insert three concrete anchors flush with the wall surface.
  5.) Mount the horizontal cross bar using 3 bolts and washers that were removed from the cement anchor. Snug the bolts but do not tighten. They will be tightened fully in a later step. 6.) Adjust the spacing between the two vertical wall supports so they are exactly the same distance apart as the Mini-Split Condensing unit mounting pads. Mark the hole locations for the bottom holes in the vertical wall supports, then slide them out of the way, and drill a 9/16” hole 2-1/2” deep for each hole. 7.) Insert a concrete anchor into each hole until flush with the wall surface. 8.) Slide the vertical wall supports back into position before installing the concrete anchors, and secure them with bolts and washers removed from the cement anchors. Tighten all six (6) bolts securely.
Supplier Information
Long Term Inc.
[ Zhejiang China ]
- Business Type : Trade Company
- Product/Service : Light , House Appliance , HVAC
- Tel : 86-574-87161651
More > Other products from this company